

Saturday, September 5, 2015
Coach Sneak Peek!
Ever wonder what it is exactly that coaches do? Now's your time to find out. I'm sharing, along with other coaches, what we do starting September 14th. Interested? Find me on Facebook (Sabrina Cheng) and message me. You can also leave a comment below on this post and I'll get back to you.


Tuesday, September 1, 2015
"Asian" Turkey Lettuce Wraps
The school year starting with a new kindergartner has me scouring the internet for recipes (I adapted this from newleafwellness) that will make my life after work-life easier. That means trying out recipes that require minimal cooking or cooking that I don't need to watch over. I decided I needed to try using my crockpot more often, so I happened upon a recipe for chicken lettuce wraps. I put quotes on the word Asian, because it really doesn't taste anything like the Chinese lettuce wraps I've had in restaurants growing up, but there is an Asian flavor to them. In any case, I decided to give it a try. It's a bit sweet and a bit salty, so that worked out. The original recipe called for ground chicken, but since I didn't have that, I used ground turkey instead.

Ingredients
1. Add all ingredients to your slow cooker and cook on “low” setting for 4-6 hours or until chicken is tender.
2. Break apart chicken and serve.
Now my slow cooker has a few settings, and it's no exactly adjustable. I can cook on high for 4 or 6 hours, or low on 8 or 10 hours. Hmm...what to do? Since I'm not home to monitor this, I opted for the low on 8 hours cooking time. When I got back, parts of the sauce were a bit burnt, which added a slightly smokey flavor my husband liked, but my kids didn't. I think the next time I might do the 4 hours on high. Or if I'm home, do the 8 hours on low setting but stop at 4 hours. Haha. In any case, the kids really liked it (I just scooped them the parts that didn't have the slightly burnt sauce) and we ate it using romaine lettuce. It was a hit for my 3 yo too, who didn't want to eat the lettuce part initially. I think watching her brother eat it and seeing that you can wrap it like a burrito made it more fun for her.
I didn't try to freeze this, but it's probably going to be in my rotation soon with maybe a few tweaks to the recipe. But here are instructions on how to freeze.
Freezing instructions
Add all ingredients to a gallon-sized plastic freezer bag. Remove as much air as possible, seal, and freeze for up to three months. Thaw in refrigerator overnight and then cook in slow cooker for 4-6 hours on “low” setting. Break apart chicken and spoon onto lettuce.

Ingredients
- 2 pounds of ground turkey
- 1 medium-sized red bell pepper, diced
- 2 large carrots, grated (1 cup)
- 4 cloves garlic, minced
- 1/4 cup low-sodium soy sauce
- 1/4 cup ketchup
- 1 tablespoon honey
- 1/4 teaspoon crushed red pepper flakes (I opted out of using these as I wanted my kids to eat it)
1. Add all ingredients to your slow cooker and cook on “low” setting for 4-6 hours or until chicken is tender.
2. Break apart chicken and serve.
Now my slow cooker has a few settings, and it's no exactly adjustable. I can cook on high for 4 or 6 hours, or low on 8 or 10 hours. Hmm...what to do? Since I'm not home to monitor this, I opted for the low on 8 hours cooking time. When I got back, parts of the sauce were a bit burnt, which added a slightly smokey flavor my husband liked, but my kids didn't. I think the next time I might do the 4 hours on high. Or if I'm home, do the 8 hours on low setting but stop at 4 hours. Haha. In any case, the kids really liked it (I just scooped them the parts that didn't have the slightly burnt sauce) and we ate it using romaine lettuce. It was a hit for my 3 yo too, who didn't want to eat the lettuce part initially. I think watching her brother eat it and seeing that you can wrap it like a burrito made it more fun for her.
I didn't try to freeze this, but it's probably going to be in my rotation soon with maybe a few tweaks to the recipe. But here are instructions on how to freeze.
Freezing instructions
Add all ingredients to a gallon-sized plastic freezer bag. Remove as much air as possible, seal, and freeze for up to three months. Thaw in refrigerator overnight and then cook in slow cooker for 4-6 hours on “low” setting. Break apart chicken and spoon onto lettuce.
Monday, August 24, 2015
French Toast Sticks
As the school year just started, I wanted to find some other quick breakfast recipes that I can prepare ahead of time and freeze for my kids to eat as we rush out the door in the morning. (In the past, we've relied on this, and it's still a favorite). I came across a version of french toast from iowagirleats that baked them, instead of pan frying them. I instantly thought, SCORE!! I don't want to have to stand over a hot stove for about 30 minutes frying up these babies.
As my son is now 5.5 yo (and I'm more willing to have him help), he helped me mix the eggs into the dip mixture, as well as pour in the vanilla.
 Original recipe
Makes 12 French Toast Sticks
Ingredients
- 4 slices Texas Toast
- 3 eggs
- 1/2 C milk
- 1 TBSP melted butter, slightly cooled
- 1 Tsp vanilla
- 1/2 tsp cinnamon
Directions:
1. Preheat oven to 350 degrees, then spray a baking sheet very well with non-stick spray and set aside. Cut bread slices into thirds, then set aside.
2. In a large shallow dish, whisk together eggs, milk, melted butter, vanilla, and cinnamon. Dunk bread sticks into batter, let excess drip off, then place onto prepared baking sheet. Bake for 16-18 minutes, spraying the tops of the French toast sticks with non-stick spray before flipping halfway through.
3. To freeze: Let cool, then place onto baking sheet and freeze. (I don't have that much freezer space, so I just cooled it on wax paper, stacked them with a sheet between each layer, put into a ziploc, and then froze flat). To reheat, microwave for 30 second to 1 minute.
They came out great! I didn't have texas toast, nor did I want to hunt for it. So I went to our neighborhood small chain market and found some bread that was sliced thicker than a regular slice of bread. I also doubled the recipe so that I would have more. I figured that the more bread to soak up the dip, the better. And I've made french toast with regular toast before, and I wouldn't think they'd hold up as well when cut into sticks. I even forgot to add the butter I had already melted and they still turned out great. A side note, instead of placing the battered bread straight onto the cookie sheet, I used my Silpat mats. Easier clean up and more even cooking, without the spray.
Enjoy!
As my son is now 5.5 yo (and I'm more willing to have him help), he helped me mix the eggs into the dip mixture, as well as pour in the vanilla.
 Original recipe
Makes 12 French Toast Sticks
Ingredients
- 4 slices Texas Toast
- 3 eggs
- 1/2 C milk
- 1 TBSP melted butter, slightly cooled
- 1 Tsp vanilla
- 1/2 tsp cinnamon
Directions:
1. Preheat oven to 350 degrees, then spray a baking sheet very well with non-stick spray and set aside. Cut bread slices into thirds, then set aside.
2. In a large shallow dish, whisk together eggs, milk, melted butter, vanilla, and cinnamon. Dunk bread sticks into batter, let excess drip off, then place onto prepared baking sheet. Bake for 16-18 minutes, spraying the tops of the French toast sticks with non-stick spray before flipping halfway through.
3. To freeze: Let cool, then place onto baking sheet and freeze. (I don't have that much freezer space, so I just cooled it on wax paper, stacked them with a sheet between each layer, put into a ziploc, and then froze flat). To reheat, microwave for 30 second to 1 minute.
They came out great! I didn't have texas toast, nor did I want to hunt for it. So I went to our neighborhood small chain market and found some bread that was sliced thicker than a regular slice of bread. I also doubled the recipe so that I would have more. I figured that the more bread to soak up the dip, the better. And I've made french toast with regular toast before, and I wouldn't think they'd hold up as well when cut into sticks. I even forgot to add the butter I had already melted and they still turned out great. A side note, instead of placing the battered bread straight onto the cookie sheet, I used my Silpat mats. Easier clean up and more even cooking, without the spray.
Enjoy!
Tuesday, August 4, 2015
Zucchini and Carrot Turkey Meatballs
I'm always trying to find ways to get my little ones to eat more veggies. They are doing well, but some times they are just not willing to try new things. I found this recipe online (onelovelylife.com) and tweaked it a bit. I made this the other night as part of dinner, and it came out so well! I didn't have all the ingredients listed, so I opted to add some grated baby carrots (that's what I had) to the recipe too. The meatballs were moist and delicious. They are gluten free and dairy free.
Ingredients:
 - 1 lb ground turkey
- 2 C grated zucchini, leaving the skin on
- 1/4 C grated carrot
- 2 cloves garlic
- 1 tsp salt
- 1/2 tsp pepper
- coconut oil, for cooking (or avocado oil)
Instructions:
Toss turkey with zucchini, carrot, garlic, salt, and peer. Mixture will be quite wet.
To cook on the stove top: Heat oil in medium pan over medium heat. Use a small scoop or a heaped tablespoon to scoop meatballs into the pan. Cook 8-10 at a time for about 5-6 minutes on the first side. Flip and cook an additional 4-5 minutes, or until golden brown and the centers are cooked through.
To bake: Drizzle a bit of oil into a baking sheet. Scoop meatballs onto the greased pan. Drizzle a bit of additional oil over the meatballs. Bake at 400 degrees for 20-25 minutes, or until cooked through. If desired, place under the broiler for an additional 2-3 minutes or until browned on top.
Serve with guacamole, salsa, or your favorite dip.

I cooked mine on the stove top with coconut oil and then placed them out on a paper towel to absorb the extra oil. I think the next time I make them, I'm going to bake them. I think it will be quicker overall to cook a large batch at once.
The verdict? The kids loved them (yay!). Again, even after heating the leftovers up, they were still so moist. So make sure you do not wring out the liquid that comes from the grated zucchinis. Enjoy!
Ingredients:
 - 1 lb ground turkey
- 2 C grated zucchini, leaving the skin on
- 1/4 C grated carrot
- 2 cloves garlic
- 1 tsp salt
- 1/2 tsp pepper
- coconut oil, for cooking (or avocado oil)
Instructions:
Toss turkey with zucchini, carrot, garlic, salt, and peer. Mixture will be quite wet.
To cook on the stove top: Heat oil in medium pan over medium heat. Use a small scoop or a heaped tablespoon to scoop meatballs into the pan. Cook 8-10 at a time for about 5-6 minutes on the first side. Flip and cook an additional 4-5 minutes, or until golden brown and the centers are cooked through.
To bake: Drizzle a bit of oil into a baking sheet. Scoop meatballs onto the greased pan. Drizzle a bit of additional oil over the meatballs. Bake at 400 degrees for 20-25 minutes, or until cooked through. If desired, place under the broiler for an additional 2-3 minutes or until browned on top.
Serve with guacamole, salsa, or your favorite dip.

I cooked mine on the stove top with coconut oil and then placed them out on a paper towel to absorb the extra oil. I think the next time I make them, I'm going to bake them. I think it will be quicker overall to cook a large batch at once.
The verdict? The kids loved them (yay!). Again, even after heating the leftovers up, they were still so moist. So make sure you do not wring out the liquid that comes from the grated zucchinis. Enjoy!
Sunday, July 26, 2015
Easy Salsa Slow Cooker Chicken
I really need to use my slow cooker more often. It makes for an easy-to-clean and quick meal. This time I decided to try a recipe that my friend Hannah made. It was delish and so versatile! Like stew, you can put whatever you want in it.
Ingredients:

-2 chicken breasts (I used partially frozen chicken breasts and 4 chicken thighs, skin off since I was making it for my whole family)
-1 can of drained beans (any kind)
- A handful of baby carrots (because that's the veggie I had)
-1/2 jar of Pace Mild Salsa (I use the 24 oz jar and poured 3/4 of the jar in there because of amount of chicken). Pace also does not have added sugar.
Directions:
Place the chicken in the slow cooker. Pour 1/2 jar of salsa (or homemade) on top of the chicken. Throw in whatever veggie you have that need to be cooked. Set it for 4-5 hrs. About an hour before it is done, pour in the drained can of beans. Shred the chicken with a fork. Voila! It came out so yummy and moist! I was thrilled.
I sauteed some onions and bell peppers in some water (yes water. I try to do that when I can instead of using oil). We used 100% whole wheat tortillas for the wrap, some quinoa for the "rice", topped it with the salsa chicken, shredded cheese and a little avocado...our homemade and delicious burrito. You can also add a bit of plain greek yogurt as a sour cream substitute. It really is similar in taste and so much healthier!
My kids (5.5 and almost 3yo) both ate and enjoyed the meal (adjust accordingly for your kids' preferences). I haven't had a chance to do it yet, but I plan on maybe baking homemade chips from the tortillas, using the same chicken to top it off for homemade nachos. Enjoy!

Ingredients:

-2 chicken breasts (I used partially frozen chicken breasts and 4 chicken thighs, skin off since I was making it for my whole family)
-1 can of drained beans (any kind)
- A handful of baby carrots (because that's the veggie I had)
-1/2 jar of Pace Mild Salsa (I use the 24 oz jar and poured 3/4 of the jar in there because of amount of chicken). Pace also does not have added sugar.
Directions:
Place the chicken in the slow cooker. Pour 1/2 jar of salsa (or homemade) on top of the chicken. Throw in whatever veggie you have that need to be cooked. Set it for 4-5 hrs. About an hour before it is done, pour in the drained can of beans. Shred the chicken with a fork. Voila! It came out so yummy and moist! I was thrilled.
I sauteed some onions and bell peppers in some water (yes water. I try to do that when I can instead of using oil). We used 100% whole wheat tortillas for the wrap, some quinoa for the "rice", topped it with the salsa chicken, shredded cheese and a little avocado...our homemade and delicious burrito. You can also add a bit of plain greek yogurt as a sour cream substitute. It really is similar in taste and so much healthier!
My kids (5.5 and almost 3yo) both ate and enjoyed the meal (adjust accordingly for your kids' preferences). I haven't had a chance to do it yet, but I plan on maybe baking homemade chips from the tortillas, using the same chicken to top it off for homemade nachos. Enjoy!

Thursday, July 2, 2015
3 Day Refresh?
I posted earlier about doing the 3 Day Refresh, but didn't talk about why. It's not like I had weight to lose, right? Well, that's not what it's about. Prior to starting, I had a few heavy meals for Father's day and my dad's birthday. Our family also went to eat out at Red Robin's the following weekend. I chose a chicken wrap, which was super yummy. BUT I also ordered the sweet potato fries...healthier than regular fries, right? That's where my head was anyway. Needless to say, soon after eating the fries, I felt SOOO uncomfortable and bloated. I felt that way after the other two heavy meals too, and it didn't feel good. I was lethargic and I had to lay down on the couch because I felt bloated. My mind space was not where it needed to be. Even though I felt bad, I felt snacky and wanted more of the same bad foods. I was just not with it.

So along comes the Refresh. I had it already, thinking I wanted to try it but was waiting for an appropriate time. Voila! The time arrived. The Vanilla Fresh shake was actually pretty good. I was expecting super sweet, but it wasn't (might've helped that I added more water to it). Because it was more diluted, it seemed to have a slight almond flavor to me. The fiber sweep was gross, even though the flavor was ok. Mix it fast and then drink it fast. Otherwise it keeps getting thicker and thicker...think goopy texture. Bleh! The green beans recipe from yesterday's post is one of the recipes you're allowed to have at dinner.
The first day I was hungry. I didn't know what to expect and part of my attitude about it all was that I didn't want to do it. I almost gave in and ate a cracker later in the evening because I was hungry after "dinner." But I told myself it was only 3 days!!! By Day 2, I was already used to the amount of food, and Day 3 was a breeze. It isn't very much food, BUT, I didn't feel starved. I was hungry, sure, but mainly on the first day, and I think it's because my body was use to feeling much fuller than it needed to be. The shakes, fruits, and healthy fats you were allowed to eat surprisingly kept me nourished even though it was low in calories.
What are my results? Less bloat, though you can't tell from the pictures...sorry. You have to just trust me that along with feeling bloated came the unpleasant effects of it too. Also, I lost 4 pounds! I wasn't expecting that part at all. So, does it work? Yup. Is it easy? Nope, but think of all the prep time you're saving by not cooking much. haha. It's not bad, but you can do anything for 3 days and the added weight loss is a plus.
Before After


So what is the 3 day refresh? Its a 3 day cleanse that is designed to help you lose weight, to help you regain control of your nutrition and to give your body that fresh clean slate it needs to continue making healthy lifestyle choices. The Refresh is a calorie restricted 3 day diet but it will not kill your metabolism or harm your body. You are eating nutrient dense foods that will give your body the proper nutrition that it needs to function properly each day over the 3 day period.
Why Refresh?
What can
you expect when refreshing?
Its about 900 calories per day but because the shakes and food selections are high in protein and fiber they help keep you satiated throughout the day. If you get a little gas or bloating that is a sign that you need to up your fiber level in general. Fiber promotes satiety, balances blood sugar, promotes cardiovascular health, and keeps your digestive tract functioning. Can you exercise? Yes, but only mild to moderate exercise during the 3 day refresh because the program will be more effective if it can focus on cleansing.
Want to learn more about it? Click the picture below or comment below.


So along comes the Refresh. I had it already, thinking I wanted to try it but was waiting for an appropriate time. Voila! The time arrived. The Vanilla Fresh shake was actually pretty good. I was expecting super sweet, but it wasn't (might've helped that I added more water to it). Because it was more diluted, it seemed to have a slight almond flavor to me. The fiber sweep was gross, even though the flavor was ok. Mix it fast and then drink it fast. Otherwise it keeps getting thicker and thicker...think goopy texture. Bleh! The green beans recipe from yesterday's post is one of the recipes you're allowed to have at dinner.
The first day I was hungry. I didn't know what to expect and part of my attitude about it all was that I didn't want to do it. I almost gave in and ate a cracker later in the evening because I was hungry after "dinner." But I told myself it was only 3 days!!! By Day 2, I was already used to the amount of food, and Day 3 was a breeze. It isn't very much food, BUT, I didn't feel starved. I was hungry, sure, but mainly on the first day, and I think it's because my body was use to feeling much fuller than it needed to be. The shakes, fruits, and healthy fats you were allowed to eat surprisingly kept me nourished even though it was low in calories.
What are my results? Less bloat, though you can't tell from the pictures...sorry. You have to just trust me that along with feeling bloated came the unpleasant effects of it too. Also, I lost 4 pounds! I wasn't expecting that part at all. So, does it work? Yup. Is it easy? Nope, but think of all the prep time you're saving by not cooking much. haha. It's not bad, but you can do anything for 3 days and the added weight loss is a plus.
Before After
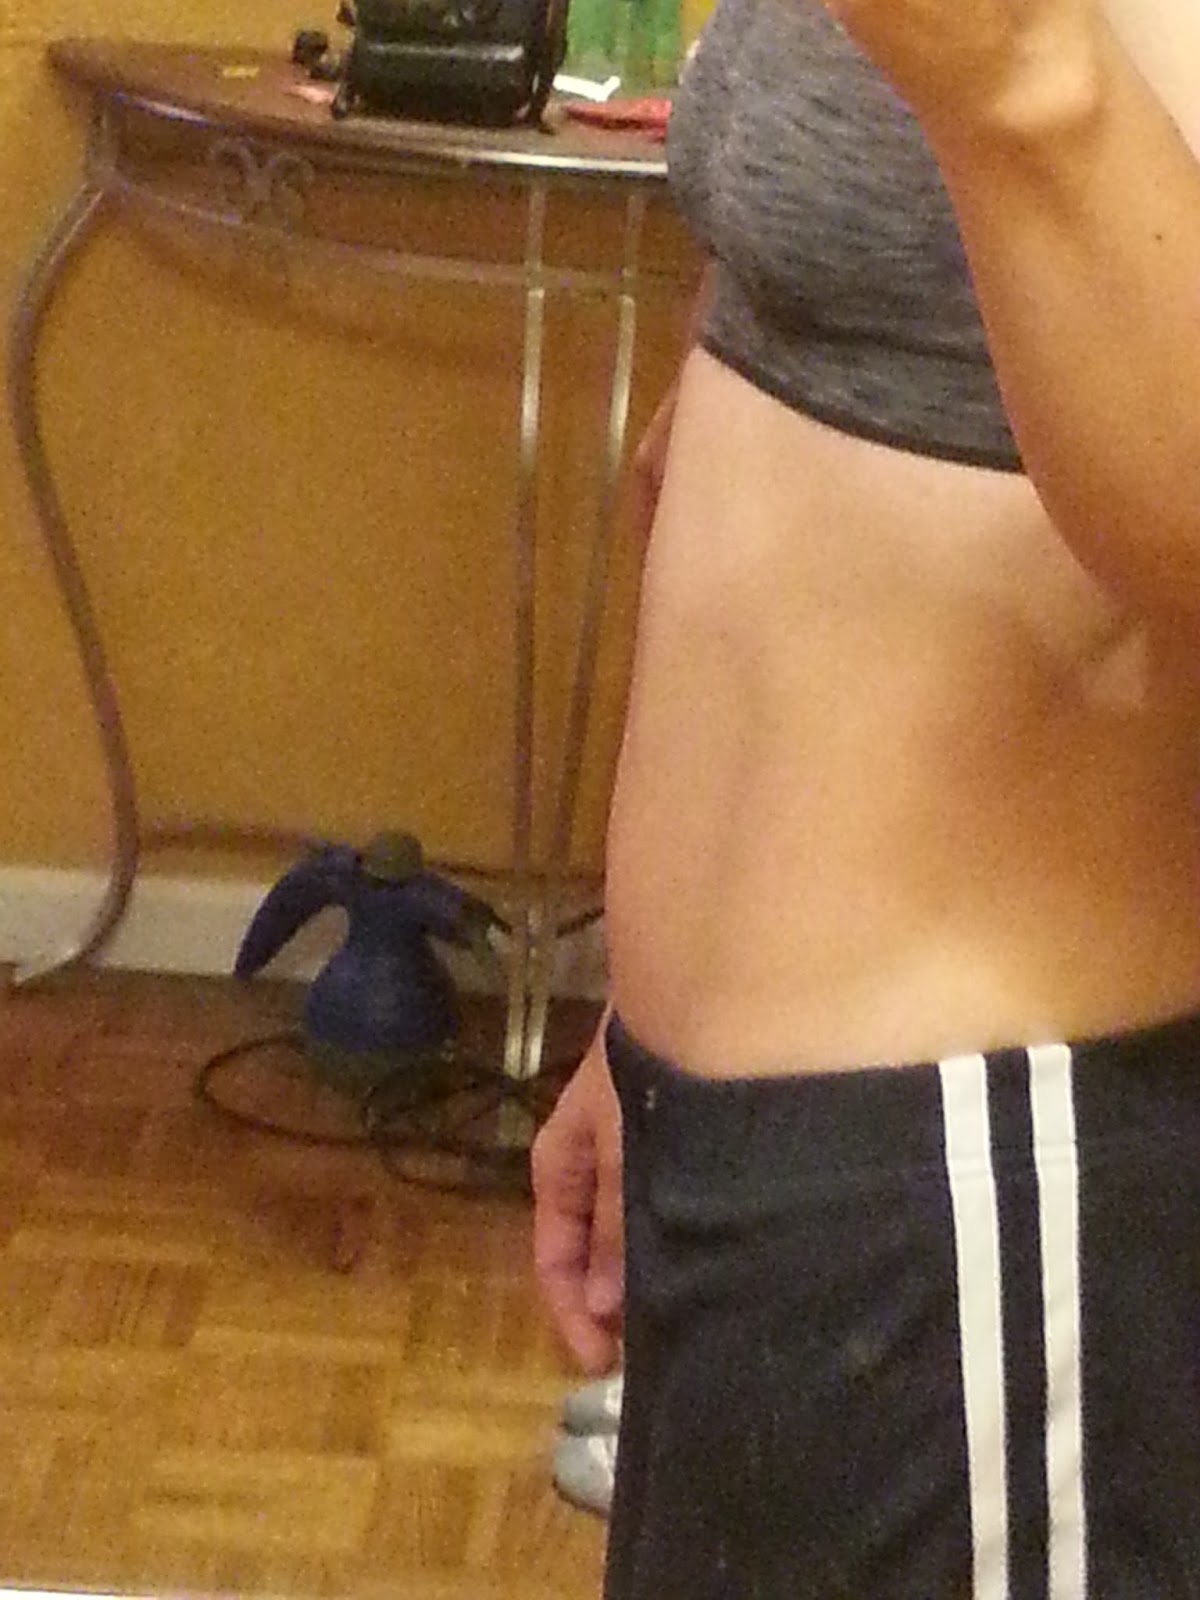

So what is the 3 day refresh? Its a 3 day cleanse that is designed to help you lose weight, to help you regain control of your nutrition and to give your body that fresh clean slate it needs to continue making healthy lifestyle choices. The Refresh is a calorie restricted 3 day diet but it will not kill your metabolism or harm your body. You are eating nutrient dense foods that will give your body the proper nutrition that it needs to function properly each day over the 3 day period.
Why Refresh?
- You need a break from a period of unhealthy eating.
- You used to eat pretty well but have recently fallen off the wagon and need some help getting back on.
- You want to jump start healthy eating habits for a new workout program.
- You want to quickly lose a few pounds for an upcoming event.
- You've never been a healthy eater, but are ready to kick start better nutrition for the first time.
- You want your clothes to fit better.
- You want more energy.
- You love food and want to be satisfied while you lose weight and get healthier
- You've tried liquid fasts or other fad diets and they simply don't work.
What does a day look like while
refreshing?
- Water, lots of water! In addition to the water you drink in your shakes and teas, we recommend you drink at least half your body weight in ounces of filtered water each day.
- Breakfast: Shakeology, plus one fruit option
- Morning Tea: 1 cup of unsweetened herbal or green tea
- Late Morning: Fiber Sweep, a digestive health drink
- Lunch: Vanilla Fresh shake, plus 1 option from the fruit list, 1 option from the vegetable list, and 1 option from the healthy fats list
- Afternoon snack: 1 option from the vegetable list, and 1 option from the healthy fats list
- Afternoon tea: 1 cup of unsweetened herbal tea (caffeine free)
- Dinner: Vanilla fresh shake, 1 option from the dinner recipes, and 1 cup of organic vegetable broth (optional)
- Evening tea: 1 cup of unsweetened herbal tea (caffeine free)
Its about 900 calories per day but because the shakes and food selections are high in protein and fiber they help keep you satiated throughout the day. If you get a little gas or bloating that is a sign that you need to up your fiber level in general. Fiber promotes satiety, balances blood sugar, promotes cardiovascular health, and keeps your digestive tract functioning. Can you exercise? Yes, but only mild to moderate exercise during the 3 day refresh because the program will be more effective if it can focus on cleansing.
Want to learn more about it? Click the picture below or comment below.
Tuesday, June 30, 2015
Lemony Green Beans
 I never thought to use lemon with green beans, but while trying the 3 Day Refresh (I'm on Day 2 now), it was one of the recipes that people reportedly liked. So I thought I'd give it a try. Not only was it yummy, but it was quick to cook too!
Given the recipe, one serving equated to about 40 green beans from this brand of French green beans at Costco. That's about 6 oz. Of course, if you're not measuring, just cook a bunch and adjust your seasonings accordingly.


I also didn't have a lemon, but I did have lemon juice, so I left out the grated lemon peel. What a handy dandy bottle. It's all about quick turn around some times, especially when you're hungry.
6 oz green beans, ends trimmed
1 Cup water
1/2 tsp extra-virgin olive oil
1 tsp Fresh lemon juice
1/4 tsp finely grated lemon peel
sea salt (to taste, optional)
1. Place green beans and water in medium saucepan over high heat. Bring to a boil. Reduce heat to maintain a gentle boil; cook, covered, for 3-4 minutes, or until tender-crisp. Remove from heat. Drain.
2. Combine green beans, oil, lemon juice, and lemon peel in small bowl; mix well. Sprinkle with salt (if desired).
Let me know what you think!
Subscribe to:
Posts (Atom)